

📢 Affiliate Disclosure:
This page may contain affiliate links. If you click on a link and make a purchase,
we may earn a small commission — at no extra cost to you.
Our editorial opinions are our own and are not influenced by any commission.
Learn more →
Reverb is an essential, yet often misunderstood mixing tool. Reverb allows us to create the illusion of space, which helps us make music sound more natural. However, it can be difficult to dial in the sound you’re looking for—especially when you’re first starting out. In this blog, you’ll learn everything you need to know to start adding depth and space to your mixes, and how to use reverb like a pro.
What Is Reverb?
Reverberation is a series of acoustic reflections that occur within a space. Depending on the timing, frequency, and volume of those reflections, we can determine the size, shape and general acoustic properties of that space.
Reverb is similar to delay but offers a distinctly different sound. Delay is a direct repetition of a sound, while reverb is a collection of reflections and repetitions that converges into one cohesive sound.
Reverb signals are comprised of three components:
- Source signal
- Early reverberations
- Reverb tail
The direct signal is the original dry sound source, which helps listeners identify where the sound source is coming from.
Early reflections occur when the sound source hits a wall or hard surface for the first time—typically within the first 30 ms of the sound occurring. This helps listeners identify where they are in the room, compared to the sound source.
The decay tail is what we hear as the sound continues to bounce around the room. The longer the sound exists in the space, you hear less of the direct signal and more reverb.
Reverb is an essential, yet often misunderstood mixing tool. Reverb allows us to create the illusion of space, which helps us make music sound more natural. However, it can be difficult to dial in the sound you’re looking for—especially when you’re first starting out. In this blog, you’ll learn everything you need to know to start adding depth and space to your mixes, and how to use reverb like a pro.

Without reverb, music sounds unnatural. Reverb provides a sense of space and natural depth that gives the listener context clues about where the performance took place, as well as where each instrument was in the room. Think of reverb as front-to-back pan controls for your mix.
Now that you have a basic understanding of how reverb works, let’s take a look at the different types of reverbs you’re like to use while recording or mixing.
History of Reverb
Reverb is one of the earliest audio effects and was used even before we had the technology to record music. Reverb naturally occurs in large, reflective spaces, and has been used in concert halls and auditoriums to enhance the sound of performances for hundreds of years.
As recording technology progressed, we created dedicated reverb rooms or chambers, which gave engineers greater control over sound by capturing both the direct and reverberant signals separately.
Eventually, studios began creating their own dedicated reverb units to simulate the reverb effect. They typically consisted of a wooden box with a piece of metal suspended inside—either a spring or a metal plate. The signal is fed directly to the spring or plate, which vibrates inside the box. These vibrations are recorded with a microphone and sent back to the console, providing a natural reverb effect.

Today, we have digital reverb plug-ins with advanced algorithms capable of recreating classic sounds from vintage rooms and reverb units. Let’s take a look at the different types of reverbs at your disposal.
Types of Reverb
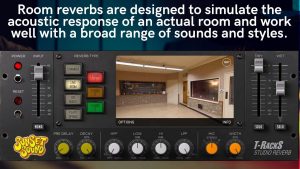
Room reverb is arguably the most common type of reverb, as it’s designed to simulate the acoustic response of an actual room—sometimes even a real room, like Abbey Road, Ocean Way or Sunset Sound studios. The tone and decay time can vary greatly depending on the dimensions and material of the room.
Room reverbs work well on most instrument types. Shorter rooms tend to sound better on uptempo songs, while longer reverb times work best when there’s plenty of time between hits to hear the decay. Since room reverbs cover such a broad range of sounds and styles, they tend to work well in almost any mix.
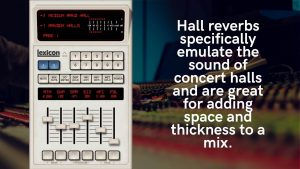
Hall reverbs are similar to room reverbs in that they simulate an actual acoustic space. However, they specifically emulate the sound of concert halls, which tend to have tall ceilings and highly reflective surfaces. Hall reverbs are great for adding space and thickness to a mix, and work especially well with orchestral arrangements.
Due to their lush sound and long decay times, hall reverbs tend to work well on drums and other percussion instruments. The long reverb tails help draw our short percussive bursts like snare drum hits. Hall reverbs also sound great on vocals—especially ballads. However, the long decay times can be problematic when working with uptempo songs, as the reverb tails begin to mask other instruments.
Before outboard reverb units were available, studios created their own by placing a speaker and a microphone in a highly reflective room, such as a tiled bathroom or cement basement. Chamber reverbs are designed to replicate this sound and fall somewhere between a room and a hall reverb.
Chamber reverbs tend to sound bright and can span a wide range of decay times. This makes chamber reverbs a great choice when you want the reverb to be a big part of an instrument’s sound, without washing out the rest of the mix like hall reverbs tend to do. For an example of what chamber reverbs sound like, check out early Beatles and Led Zeppelin recordings.

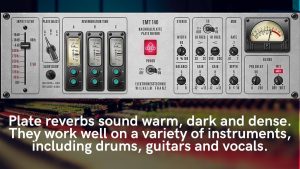
Unlike the other reverbs listed above, plate reverbs do not emulate an actual acoustic space. Created by suspending a metal plate inside a large wooden or steel frame, plate reverbs sound warm, dark and dense.
Plate reverbs work well on a variety of instruments—particularly vocals, drums and 80s-style arena-rock guitars. Arguably the most well-known plate reverb is the EMT 140, which was used extensively at Abbey Road and can be heard on countless classic recordings.
Similar to plate reverbs, spring reverbs are created by placing a metal spring inside of a wooden box. An electrical signal is sent to the spring, which causes vibrations, and the result ambiance is captured using a contact mic.
Due to their compact size, Spring reverbs are commonly found in guitar amps, but can also be found in dedicated studio spring tanks. Spring reverbs tend to sound bright, bouncy and a little metallic, making them ideal for adding a short slapback sound to guitars and vocals.

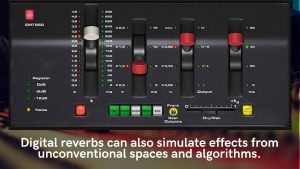
Last but not least, many reverb plug-ins feature unique algorithms for creating sounds that are impossible to replicate in the real world. For example, “non-linear” algorithms manipulate the volume of the reverb tail to increase and decrease over time, creating otherworldly effects.
Digital reverbs can also simulate what reverb effects from unconventional spaces. Have you ever wondered what your vocals would sound like coming from the inside of a soup can? What about the acoustic response of the craters on the moon? Digital reverbs open up a whole new world of sonic possibilities!
Reverb Controls
While every reverb plug-in is unique, they all share similar controls. Some plug-ins are designed to analog reverb units, such as plates and springs. But with digital reverbs, one of the first things you’ll need to adjust is the algorithm, which allows you to choose which type of reverb you want to use.
Some reverbs may also include options for selecting IRs or Impulse Responses. IRs are essentially digital renderings of actual acoustic spaces that allow you to simulate what a signal would sound like in that room.
Next, you’ll use the pre-delay and decay time controls to adjust the overall length of the reverb. Increasing the pre-delay adds a short delay between the direct signal and the early reflections, which helps listeners identify the instrument and prevents tracks from sounding washed out. If you want to add reverb to a track but don’t want to push it too far back in the mix, turn up the pre-delay.
The decay time controls the length of the reverb tail. Increase the decay time for a longer tail, or decrease it for a shorter tail. Try to time it so the tail of your reverb becomes inaudible just before the next downbeat.
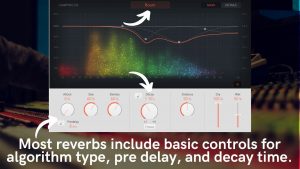
Some reverbs also include additional controls for further shaping your sound, such as dedicated high-pass and low-pass filters, or diffusion controls, which controls how quickly the original signal transitions from early reflections to full reverberation. I like to think of the diffusion knob as controlling how full the room is. With a packed house, it takes longer to hear reverb because everyones’ bodies absorb the sound waves.
Finally, the wet/dry controls allow you to adjust the balance of the original dry signal versus the processed reverb sound. When using a reverb on an aux send, set the controls to 100% wet and adjust the balance using the send levels or by adjusting the level of the effects return. When using a reverb plug-in as an insert on a single track, use the wet/dry knob to dial in the perfect balance.
Now that you know how to control a reverb plug-in, let’s take a look at some tips for using reverb in your mixes.
How To Use Reverb In A Mix
Reverb is a powerful mixing tool that’s great for adding depth and glue to your tracks. One of the most common uses of reverb is to control where each instrument is placed in the mix from front to back—almost like a pan control for depth.
We can use varying levels of reverb on different tracks to create the illusion of depth. When a sound is far away, it sounds more reverberant. When it’s close to the listener, there is little or no reverb. By adding more reverb to a track, you can push an instrument back in the mix.
To achieve this effect, it’s best to create a new aux track with one type of reverb and send each instrument to reverb bus at varying levels. Remember, it’s not just about how much reverb a track has—you also have to consider how loud the direct signal is in the mix.
If the dry signal is too high, it will sound like a loud instrument in a big room. By lowering the amount of the dry signal, you can push the instrument further back in the room and make it less prominent in the mix to make room for the lead instrument. This approach is also a great way to make your mix feel more cohesive—like everything was recorded in the same space at the same time.

Some engineers like to use different reverb types for different groups of instruments. For instance, you might use a hall reverb on the drums and a short room or plate reverb on the vocal—or vice versa. This approach can help create varying levels of depth, but can also make your mix sound uncontrolled like all of the tracks exist in their own space.
Reverb can be used as ear candy to grab the listener’s attention and help make a track stand out in the mix. This technique generally works best with slower songs that have enough space between each hit to hear the decay of a reverb tail. It also works great to help short sections like solos or fills stand out from the rest of the track.
Sometimes, it can be hard to fit reverb into a mix. When this happens, use a shelf EQ like MIXROOM or BASSROOM to massage the frequency response of your reverb returns. Try rolling-off the lows and the highs to make the reverb sound less subtle, or boost the high-end to make it sparkle and stand out.
Finally, it’s worth noting that people tend to add less reverb when they mix on headphones and more reverb when they mix on monitors. So try to preview your reverb settings on both before settling on the perfect amount of reverb.
Follow these tips on your next session to dial in professional-sounding mixes with deep, lush reverbs!